
Google’s 2-Step Verification works by requiring two pieces of information when you log in: your password and a second method of confirmation, usually involving your phone. This can be a security key, a prompt, or a one-time code. Even if someone has your password, they won’t be able to access your account without that second factor, making your account much harder to compromise.
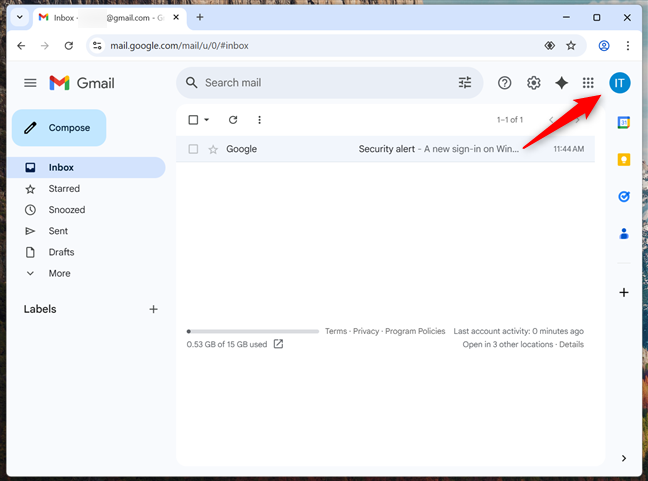
Start by opening Gmail, logging into your Google Account, and clicking or tapping your avatar (profile photo or initials) in the top-right corner.
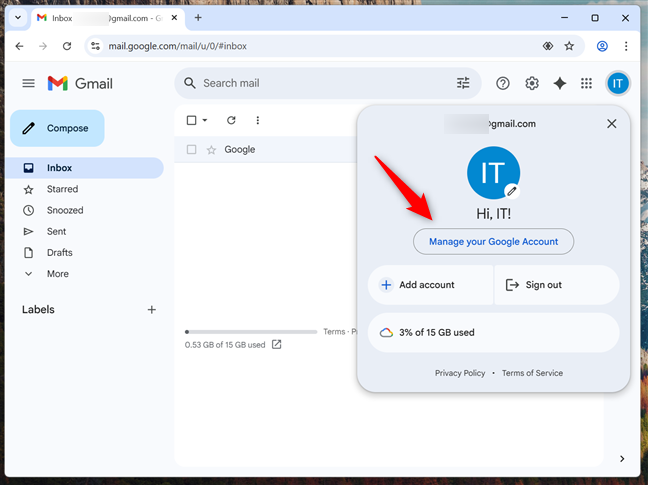
From the dropdown menu, choose Manage your Google Account.
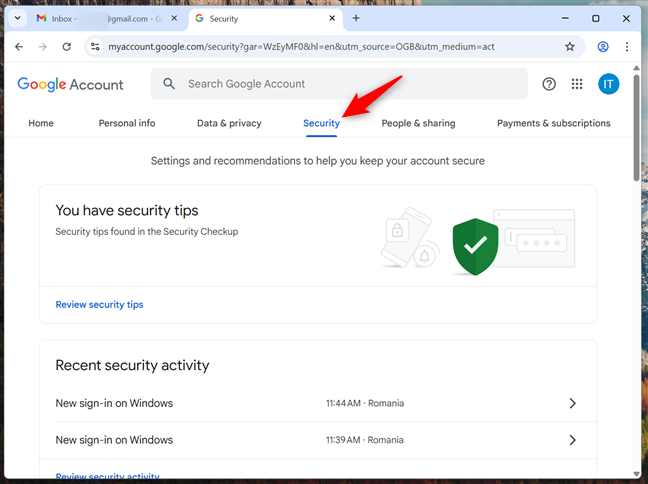
In your Google Account settings, find and click or tap the Security tab in the top navigation menu.
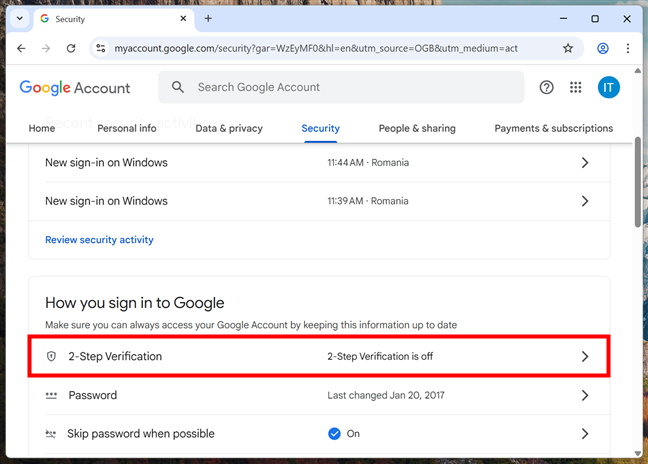
Scroll until you find the “How you sign in to Google” section, and click or tap 2-Step Verification.
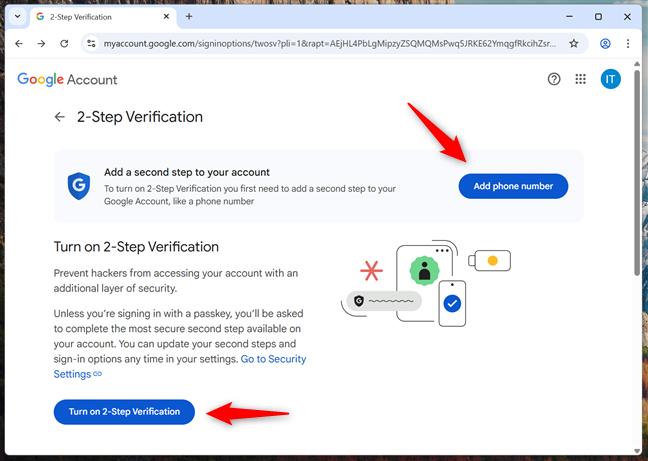
A new page appears, explaining the benefits of 2-Step Verification. Click or tap Add phone number or Turn on 2-Step Verification to continue.
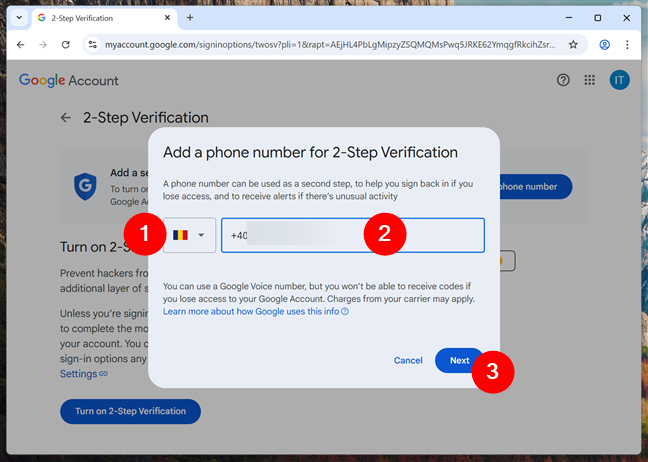
You’re asked to enter a phone number to receive verification codes. Type your phone number, then click or tap Next.
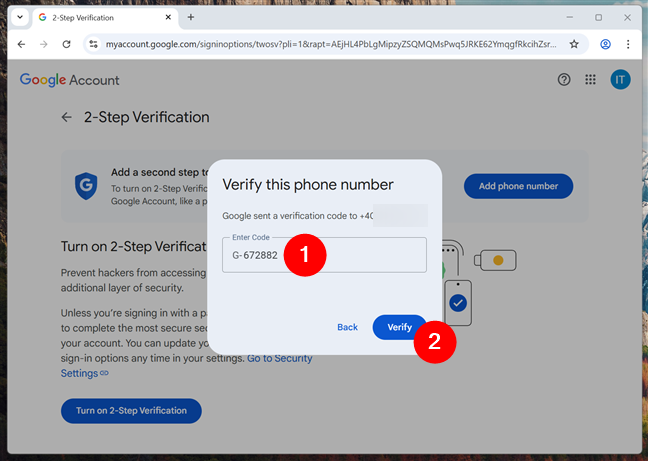
Next, you receive a six-digit code on your phone. Enter it in the “Verify this phone number” dialog in your browser, then click Verify.
If everything works properly, you get a confirmation message, and your phone is added to your Google Account. Click or tap Done to complete the process.
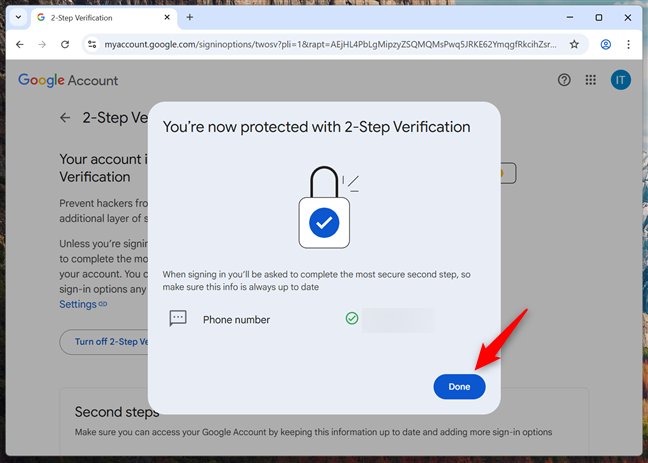
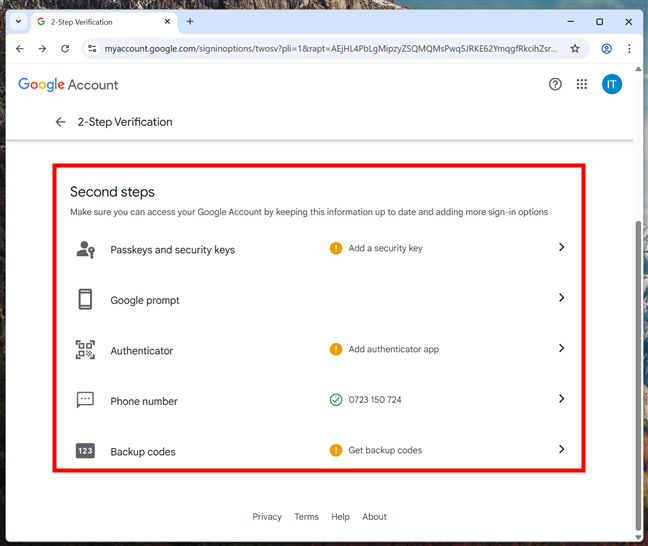
After activation, you’re taken back to the 2-Step Verification web page confirming your account is protected.

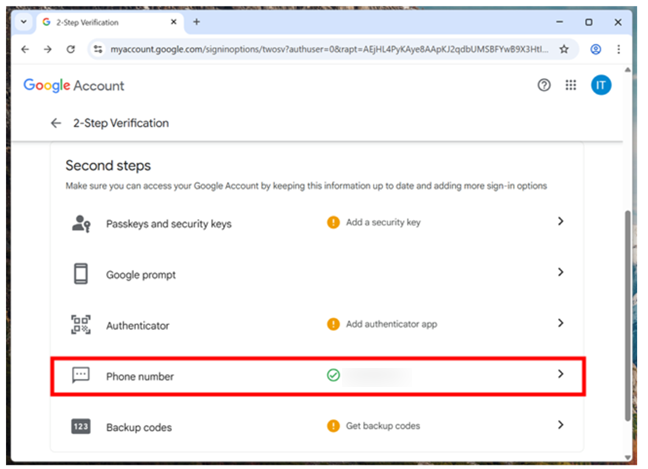
Here, you can also add other verification methods: Passkeys and security keys, Google prompt, Authenticator apps, Phone number, and Backup codes. Scroll down to the Second steps section to find these options, and check out the next chapter in this guide to learn how to take advantage of them.
NOTE: Wondering why you seem to always have to do 2-Step Verification? That’s probably because Google noticed something a bit off. For example, when you’re using a new device, logging in from a different place, or you just cleared your cookies. It’s just a quick security check to make sure it’s really you, not someone trying to hack into your account.

After turning on 2-Step Verification, Google uses your phone by default. You can also add other ways to verify your identity, depending on what works best for you. Here are the most common extra options and how to set them up:
Passkeys and physical security keys provide one of the most secure methods of two-step verification. A passkey is tied to your device and verified using a screen lock, while a security key is a physical device (USB, Bluetooth, or NFC) that you connect to your computer or mobile device during login.
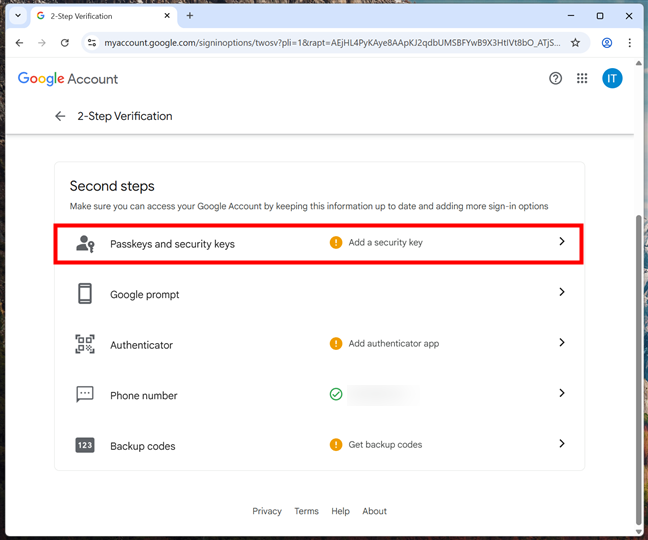
To begin setting up a passkey or security key, navigate to your Google Account’s 2-Step Verification settings. There, look for the option labeled Passkeys and security keys and click or tap it.
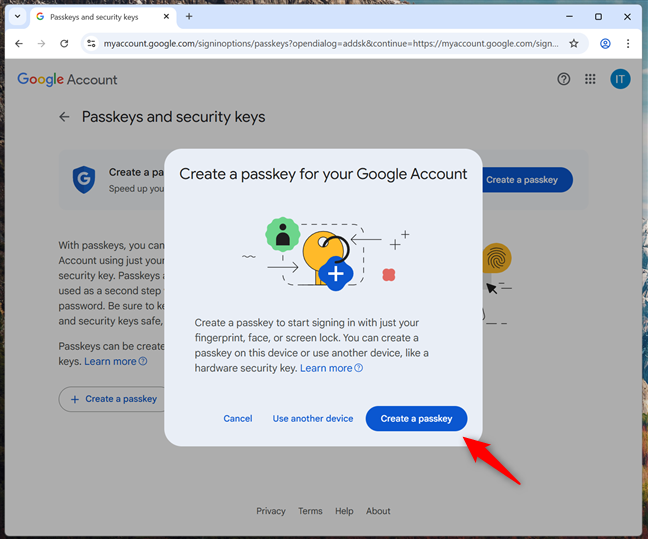
On the next screen, you’re prompted to create a passkey. Click or tap the Create a passkey button to start the process.
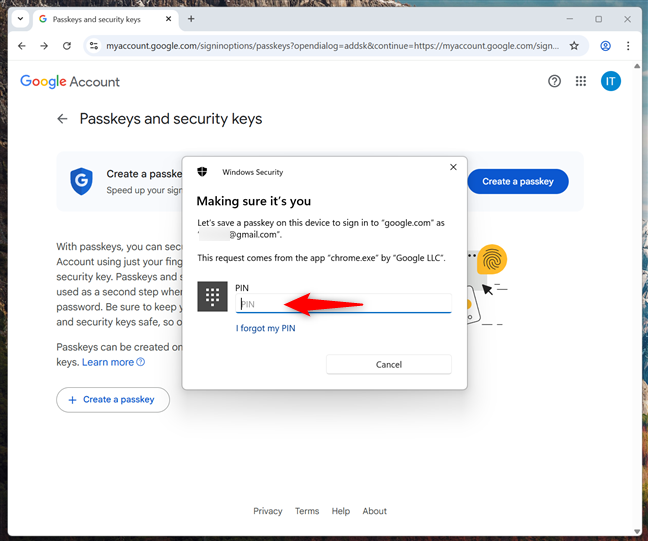
Google then asks you to verify your identity using your device’s login method. On Windows, this might mean entering your PIN or using other Windows Hello sign-in options. On mobile devices, you might have to enter your PIN, too, or use other authentication methods you’ve configured.
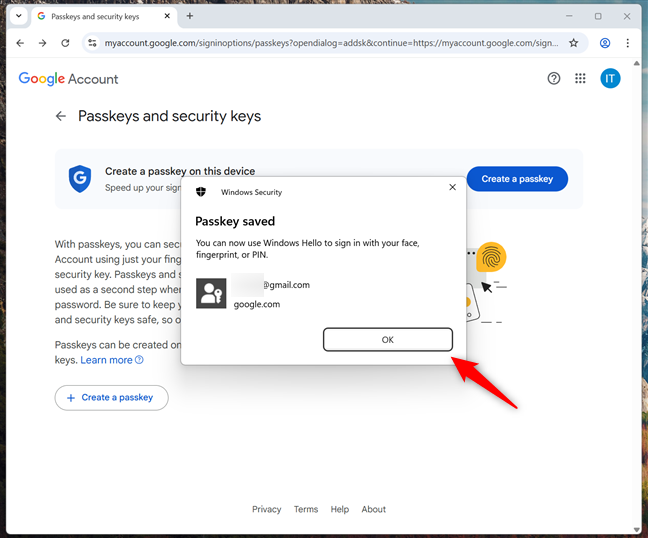
Once confirmed, a message appears showing that the passkey has been saved successfully. Click or tap OK to continue.
You then receive a final confirmation that the passkey was created. You can now use your fingerprint, face, screen lock, or other sign-in method you have on your device. Click or tap Done to complete the setup.
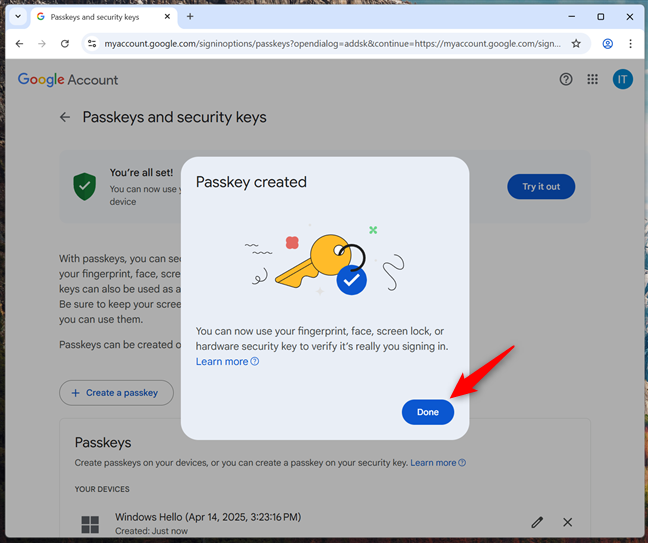
From this point on, your device can be used to verify your identity in place of text messages or codes. You can also test the setup by clicking Try it out to simulate a login.

Alternatively, you can choose to create a passkey on another device instead of your current one. When prompted to create a passkey, click or tap Use another device instead of proceeding with the default Create a passkey option.

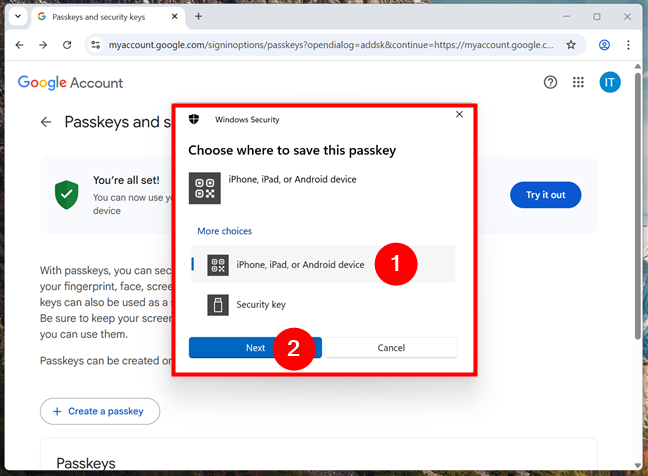
You’ll be asked where you want to save the passkey. Select between using an iPhone, an iPad, an Android device, or a hardware security key. After making your choice, click Next.
If you choose a mobile device, a QR code appears on your screen. Just scan it with your smartphone or tablet to register the passkey. What happens next depends on your mobile device. For example, Samsung Galaxy smartphones might ask you to save the passkey in Samsung Wallet, while others might use Google Password Manager.

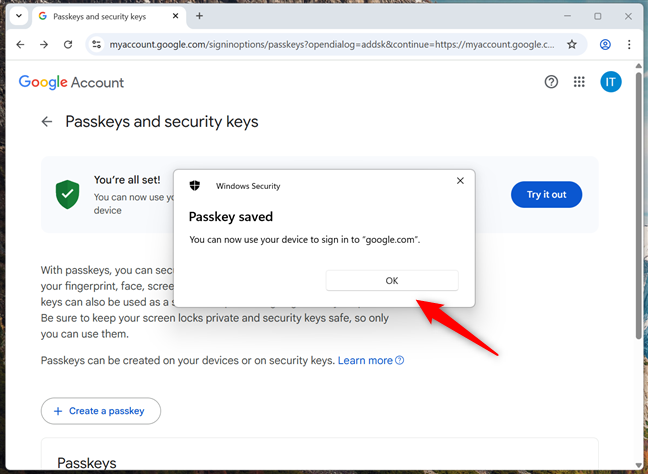
Once your device is connected successfully, a message lets you know that you can continue the setup process directly on your phone. When the passkey is saved, you’ll see a final confirmation message. Click OK to finish.
NOTE: Having said that, it’s worth noting that you can add passkeys on as many mobile devices as you want. Just repeat the steps above and follow the prompts on your smartphones or tablets for that.
Google prompts are an easy way to verify your identity using your smartphone. When someone tries to sign in to your account, a notification pops up on your phone asking if it’s you. Just tap Yes to approve or No to block it. From what I’ve seen, Google now turns on Google prompt by default when you enable 2-Step Verification for all devices linked to your account.
If you want to check it, go to Google prompt under the Second steps section.

There, you see a page explaining how a Google prompt works: it sends you a prompt each time someone tries to sign in, and you can approve it with one tap.
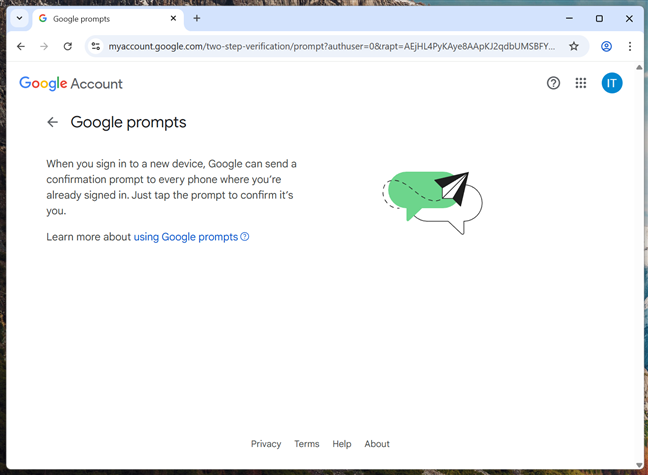
It’s a fast and secure way to keep your account safe.
An authenticator app generates one-time passcodes that refresh every 30 seconds. These codes work even when your phone has no internet access. Google supports its own Google Authenticator app, as well as third-party apps like Microsoft Authenticator.
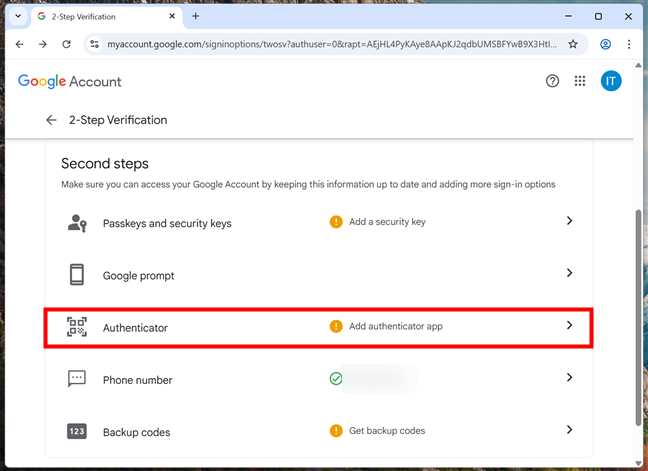
To set up this method, go to your 2-Step Verification settings and click on Authenticator from the list of Second steps.
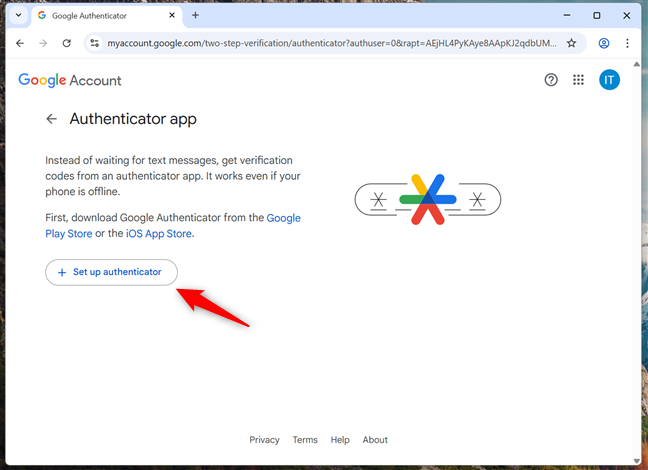
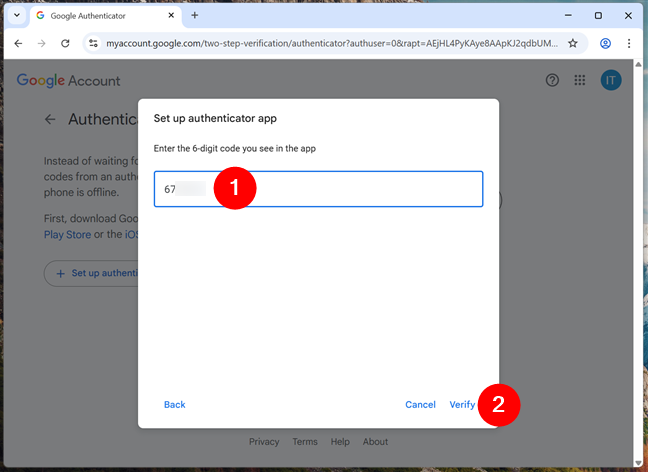
On the next screen, you’re advised to download the Google Authenticator app from the Google Play Store (for Android) or the Apple App Store (for iPhones). However, as I mentioned earlier, you’re not required to use Google Authenticator; you can also use other authenticator apps, including Microsoft Authenticator. Regardless, once you have an authenticator app installed on your mobile device, click or tap the Set up authenticator button.
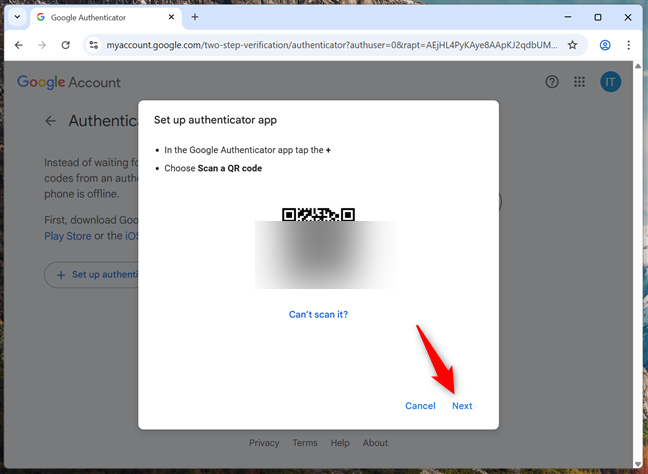
Google will display a QR code. Open the authenticator app you have on your phone and use it to scan the QR code on your computer’s screen. Then, click or tap Next.
After scanning, your authenticator app will start generating 6-digit codes for your account. Enter the current code shown in the app into the Google prompt on your screen, then click Verify.
If the code is correct, Google confirms that the authenticator app has been set up successfully.

You can now use this method to verify your identity when signing into your Google Account. It’s fast, secure, and works even when your phone is offline.
In case your primary phone is lost, stolen, or dead, having a backup phone number means you can still receive verification codes. This is especially important if your main method fails or becomes inaccessible.
To add or manage your phone number, go to the 2-Step Verification settings and select Phone number from the list.
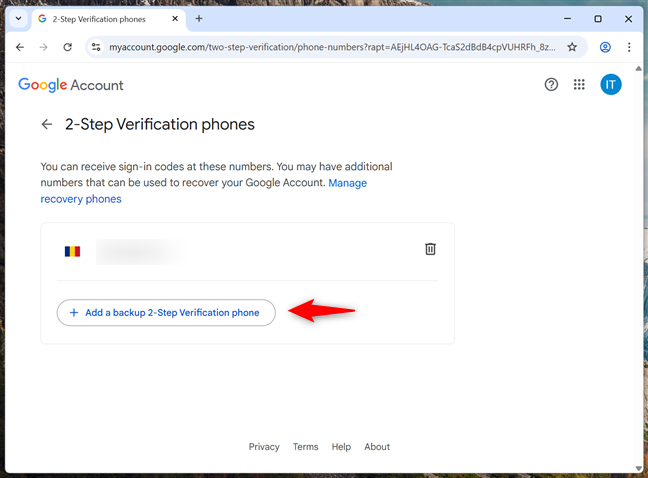
If you already have a number saved, you see it listed here. You can edit, remove it, or add a backup number. Click Add a backup 2-Step Verification phone to enter a secondary phone number in case your primary one becomes unavailable.
Then, after entering the backup number, Google will send a verification code, just like it did for the primary phone number you’ve configured. Enter the code to confirm, and your backup number is saved to your account.
If you still can't find an answer to what you're looking for, or you have a specific question, open a new ticket and we'd be happy to help!
Contact Us